

Hi all!
This may be quite a long blog. I have a lot to talk about since I have two patterns for this post.
First, before I start talking about the Twelve Days of Christmas, I want to put some spotlight on a fellow crocheter, Vanja at AmigurumiBB Blog. She created these adorable Christmas ornaments and because of a comment I left on the original blog, she made a Christmas Ornaments Part2 to include patterns for a penguin and a Mrs. Claus ornament. Thanks again Vanja!
Anyways, back to the Twelve Days of Christmas…
Obviously, I’m quite behind with only 8 more days until Christmas Eve, but I am so determined to get this done.
Day 5 Pattern: Crochet gift boxes
 My family always saves gift boxes, especially if we get any small jewelry gift boxes (the cardboard boxes not the fancy boxes that actually hold the jewelry). Jewelry is always a great gift for people even if it is from Claire’s or Kohl’s (my two favorites) but those don’t come with nice boxes. And after reusing our boxes over the years, the tape has built up and made the boxes crappy looking. To replace them, I came up with these cute reusable (tape free!) crocheted gift boxes. I lined the box with plastic canvas to make it stiff (although if you had a square cardboard box it might cut down on the time to make this) and with felt to hide the ribbon and the plastic canvas.
 You need:
- 1 ball of Simply Soft Caron yarn in Red
- Approximately 24 inches of ribbon
- 1 square of clear plastic canvas used (normally used for needlepoint)
- 1 8×10 rectangle of red felt.
- G Hook
Special stitches:
Single crochet decrease: yo, insert hook into stitch, yo, pull loop up through first loop, yo, insert hook into next stitch, yo, pull loop up through all loops on hook.
Bottom:
Row 1: Ch 2, 3 sc in first ch. Turn. (3 sc)
Row 2: Ch 1, sc in first stitch, 3 sc in next stitch, sc in next stitch. Turn. (5 sc)
Row 3: Ch 1, sc in first two stitches, 3 sc in next stitch, sc in remaining stitches. Turn. (7 sc)
Row 4: Ch 1, sc in first three stitches, 3 sc in next stitch, sc in remaining stitches. Turn. (9 sc)
Row 5: Ch 1, sc in first four stitches, 3 sc in next stitch, sc in remaining stitches. Turn. (11 sc)
Row 6: Ch 1, sc in first five stitches, 3 sc in next stitch, sc in remaining stitches. Turn. (13 sc)
Row 7: Ch 1, sc in first six stitches, 3 sc in next stitch, sc in remaining stitches. Turn. (15 sc)
Row 8: Ch 1, sc in first seven stitches, 3 sc in next stitch, sc in remaining stitches. Turn. (17 sc)
Row 9: Ch 1, sc in first eight stitches, 3 sc in next stitch, sc in remaining stitches. Turn. (19 sc)
Row 10: Ch 1, sc in first nine stitches, 3 sc in next stitch, sc in remaining stitches. Turn. (21 sc)
Row 11: Ch 1, sc in first 10 stitches, 3 sc in next stitch, sc in remaining stitches. Turn. (23 sc)
Row 12: Ch 1, sc in first 11 stitches, 3 sc in next stitch, sc in remaining stitches. Turn. (25 sc)
Row 13: Ch 1, sc in first 12 stitches, 3 sc in next stitch, sc in remaining stitches. Turn. (27 sc)
Rnd 1 (working in back loop only): Ch 1, sc in next 13 stitches, skip 1, sc next 15 stitches, work 15 sc in next side of square, work 15 sc in final side, Sl st in first sc. (52 sc)
Rnd 2 (working in back loop only): Sl st into next st. Ch 1, Sc in same stitch, sc in next 5 stitches, work 2 sc into next stitch, sc in next 6 stitches, scd, *sc in next 6 stitches, work 2 sc into next stitch, sc in next 6 stitches, scd. Repeat from * 2 more times. Sl st into top of first sc. (52 stitches)
Rnd 3 – 8: Repeat row 2. Fasten off.
If you want your box to be taller, just continue repeating Rnd 2 until its the height you like.
Top:
Row 1: Ch 2, 3 sc in first ch. Turn. (3 sc)
Row 2: Ch 1, sc in first stitch, 3 sc in next stitch, sc in next stitch. Turn. (5 sc)
Row 3: Ch 1, sc in first two stitches, 3 sc in next stitch, sc in remaining stitches. Turn. (7 sc)
Row 4: Ch 1, sc in first three stitches, 3 sc in next stitch, sc in remaining stitches. Turn. (9 sc)
Row 5: Ch 1, sc in first four stitches, 3 sc in next stitch, sc in remaining stitches. Turn. (11 sc)
Row 6: Ch 1, sc in first five stitches, 3 sc in next stitch, sc in remaining stitches. Turn. (13 sc)
Row 7: Ch 1, sc in first six stitches, 3 sc in next stitch, sc in remaining stitches. Turn. (15 sc)
Row 8: Ch 1, sc in first seven stitches, 3 sc in next stitch, sc in remaining stitches. Turn. (17 sc)
Row 9: Ch 1, sc in first eight stitches, 3 sc in next stitch, sc in remaining stitches. Turn. (19 sc)
Row 10: Ch 1, sc in first nine stitches, 3 sc in next stitch, sc in remaining stitches. Turn. (21 sc)
Row 11: Ch 1, sc in first 10 stitches, 3 sc in next stitch, sc in remaining stitches. Turn. (23 sc)
Row 12: Ch 1, sc in first 11 stitches, 3 sc in next stitch, sc in remaining stitches. Turn. (25 sc)
Row 13: Ch 1, sc in first 12 stitches, 3 sc in next stitch, sc in remaining stitches. Turn. (27 sc)
Row 14: Ch 1, sc in first 13 stitches, 3 sc in next stitch, sc in remaining stitches. Turn. (29 sc)
Row 15: Ch 1, sc in first 14 stitches, 3 sc in next stitch, sc in remaining stitches. Turn. (31 sc)
Rnd 1 (working in back loop only): Ch 1, sc in next 15 stitches, skip 1, sc next 5 stitches, skip 5 stitches, ch 4, sc in next 5 stitches, work 15 sc in next side of square, work 5 sc, ch 4, and 5 sc in final side (to mirror that in opposite side), Sl st in first sc. (56 stitches)
Rnd 2 (working in back loop only): Sl st into next st. Ch 1, Sc in same stitch, sc in next 5 stitches, work 2 sc in next stitch, sc in next 6 stitches, scd, sc in next 4 stitches, work 6 sc into ch 4 space, sc in next 4 stitches, scd, sc in next 6 stitches, work 2 sc into next stitch, sc in next 6 stitches, scd, sc in next 4 stitches, work 6 sc into ch 4 space, sc in next 4 stitches, scd, sl st into top of first sc. (60 stitches).
Rnd 3 -4 (working in back loop only): Sl st into next st, Ch 1, sc in same stitch, sc in next 5 stitches, work 2 sc in next stitch, *sc in next 6 stitches, scd, sc in next 6 stitches, work 2 sc in next stitch, sc in next 6 stitches, scd. Repeat from * 2 more times. Sl st in first sc. Fasten off.
 Cut pieces of the plastic canvas to fit the bottom of the box, the top of the box, and the four sides (on bottom piece). Cut the ribbon into 2 12 inch pieces. Sew one end of the ribbon on one side of the bottom. Sew one end of the other ribbon on the opposite side of the bottom. Line the box with the felt. I used this tutorial to learn how to sew a rectangular lining. I also lined the lid so that the plastic canvas wasn’t showing. To close the box just insert the ribbons into the two holes on the top and tie.
Now you have an adorable little box!
I hope you all like it!


Day 6 Pattern: Crochet Steering Wheel Cozy
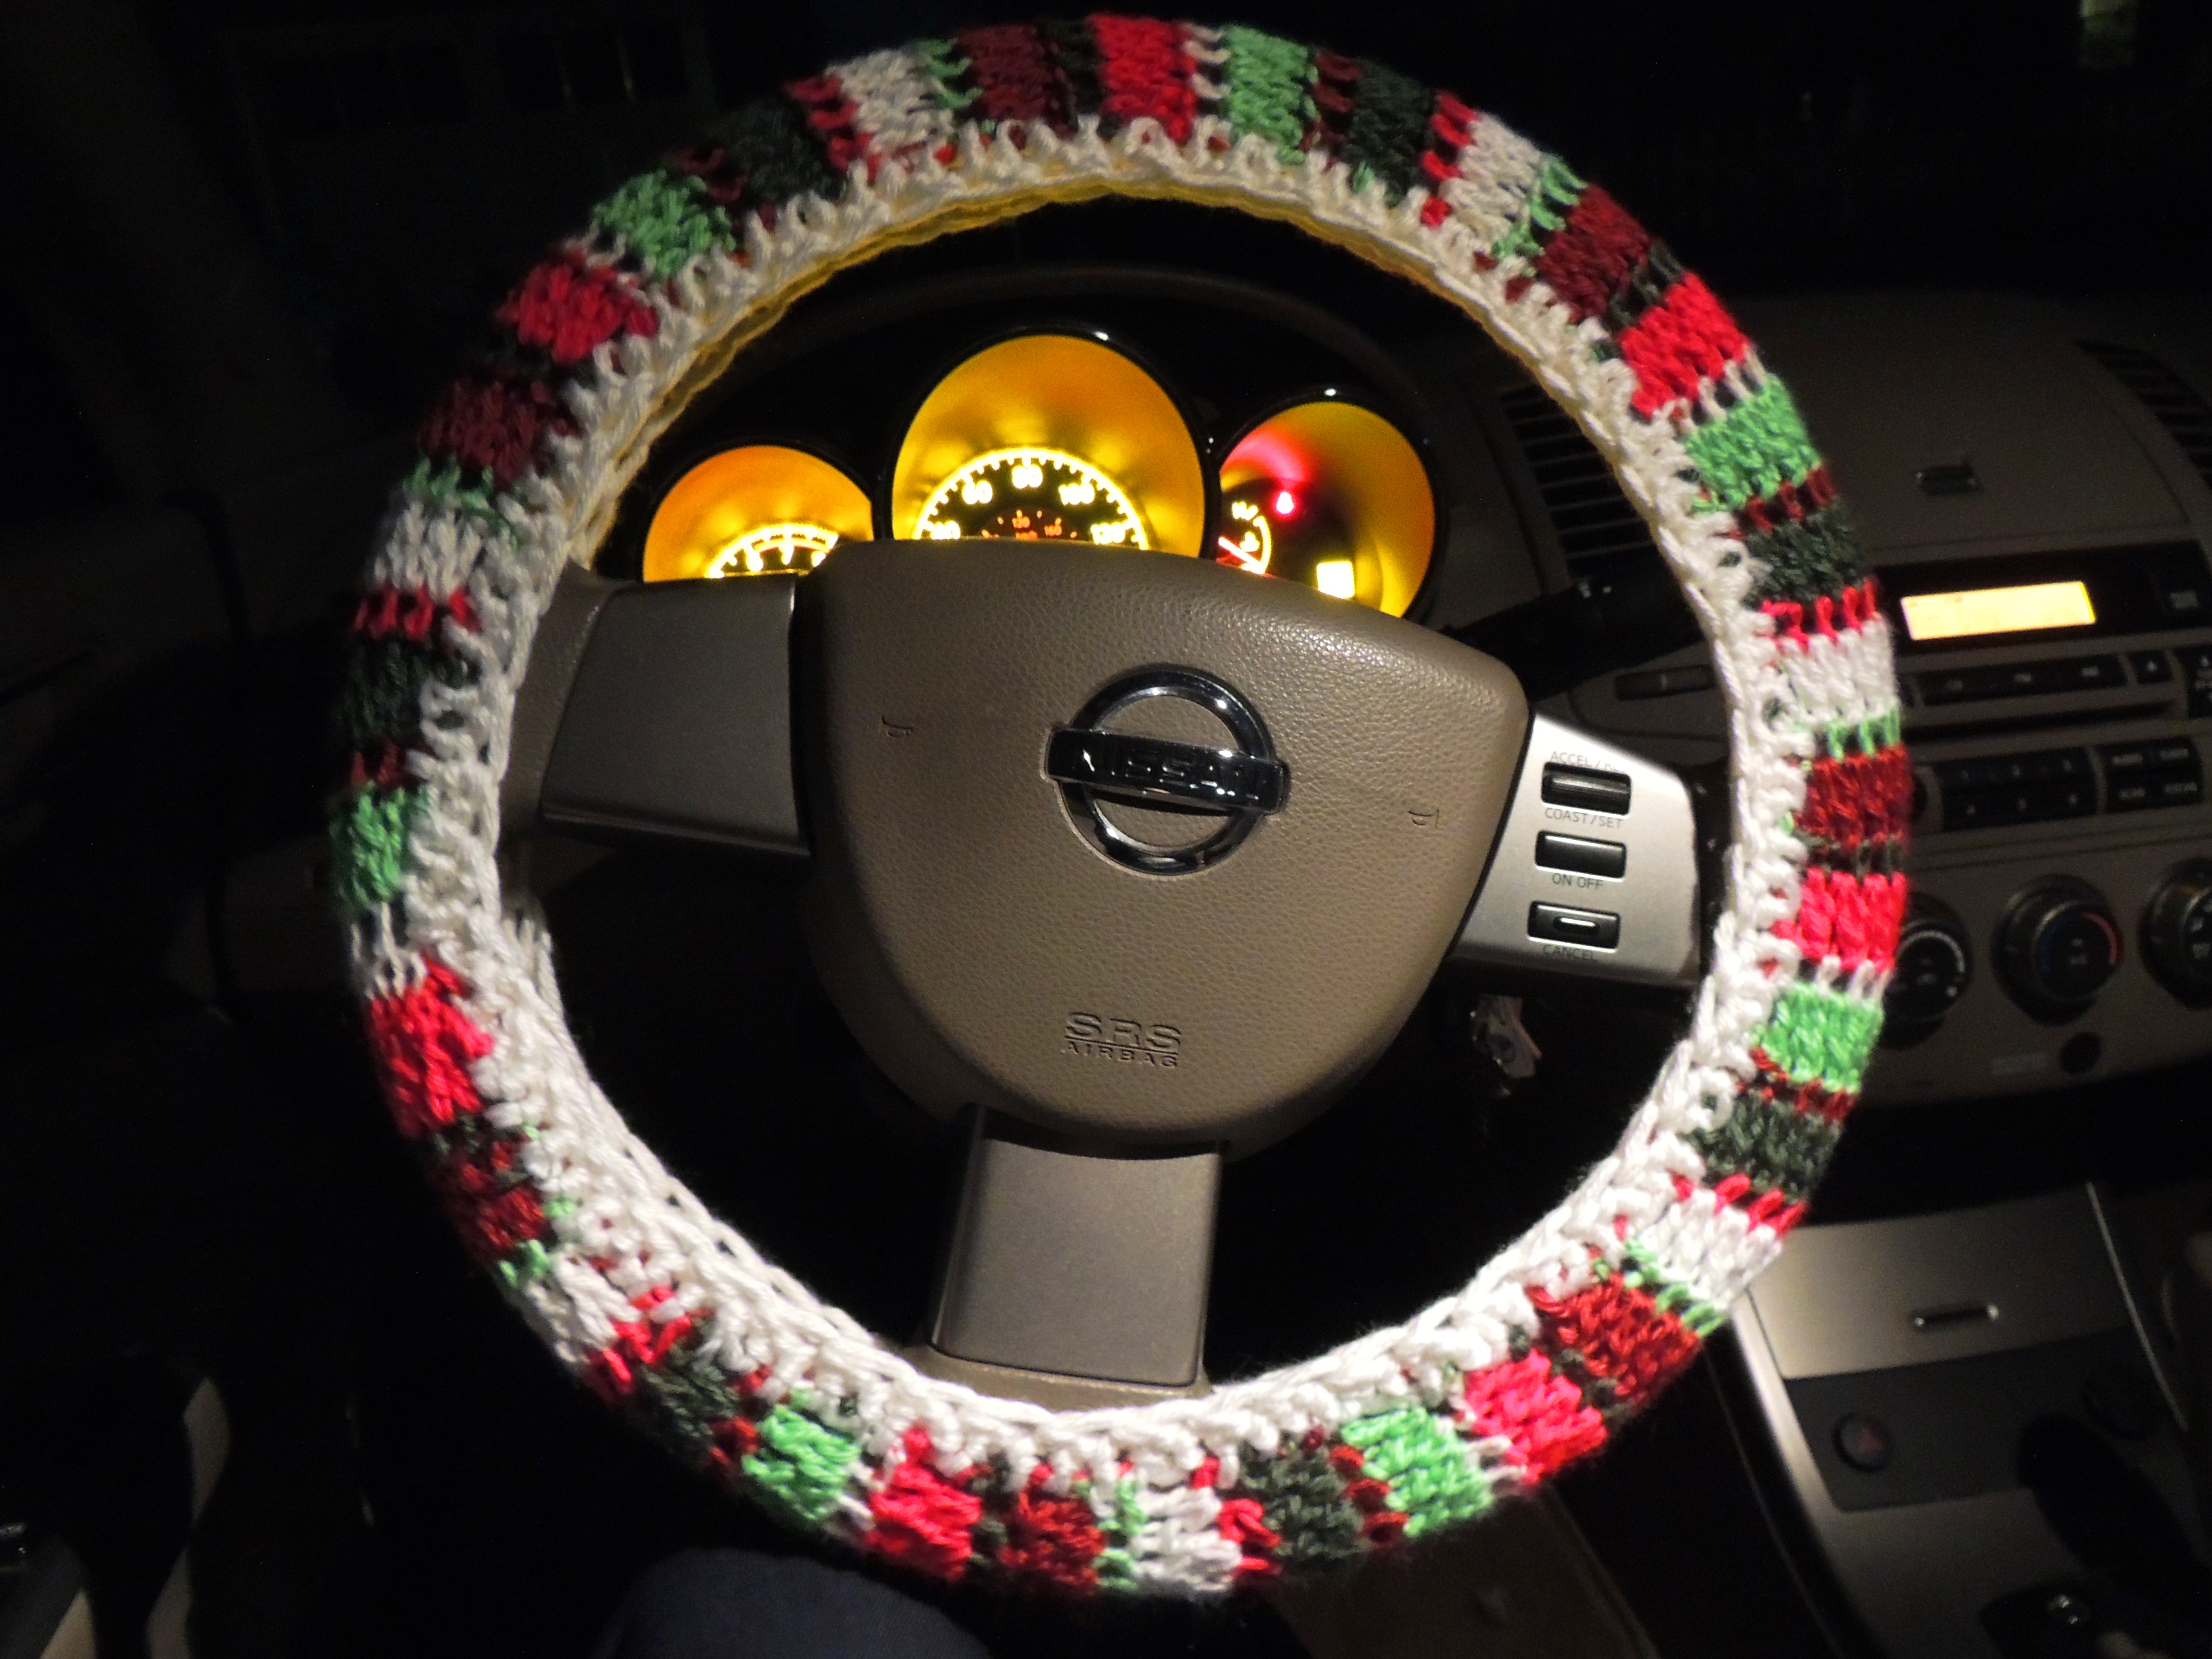 I was inspired to make this pattern the other morning after it snowed and my car was iced over. I don’t know why but I always expect the inside of my car to be warmer than it actually is when its cold outside. After finally getting all of the ice off of my windshield, my hands were looking forward to the reprieve of my warm car which of course was not actually very warm (despite having started my car). I was running late for work and didn’t have any more time to wait for my car to heat up. As soon as my fingers hit my steering wheel, I immediately had to pull them away. I don’t understand how a steering wheel can be so COLD! I decided right then and there that a steering wheel cozy was a must.
You need:
- 2 balls of Simply Soft Caron yarn in White (A), 1 ball each of Simply Soft Caron yarn in Dark Sage (B), Autumn Red (C), Limelight (D) (I think, I didn’t realize that the label had been replaced with a white one in the store), and Red (E).
- I hook.
 To make this pattern, I used the Zig-Zag Pip Stitch from “The Harmony Guides: Basic Crochet Stitches” by Erika Knight. Unfortunately, I’m not actually sure if I am allowed to publish this pattern because I used this stitch (I didn’t think about it at the time of its creation); I wouldn’t want to infringe on someone’s copyright. So for now I am going to give you a simplistic version of a crochet steering wheel. If you know whether or not I can publish the pattern, please let me know.
To make the steering wheel cozy, you must work 16 stitches in each row until the project reaches about 32 inches. Work one row in A, B, C, D, and E until you reach the end of the project. Connect the two ends together to make a large circle. Using 2 pieces of white yarn, work 108 sc into the side of the large ring you made. Slip stitch into first sc. Ch 1 and Scd all the way around for round two. fasten off and repeat on opposite side.
I think you can use most stitches as long as it can be worked within 16 stitches. Depending on the stretchiness of the stitch, you may need to increase the length of the project from the original 32 inches.
Sorry this pattern is so simplistic and not very informative, I hope to update this later either with the Zig Zag Pip stitch or with a replacement stitch that I know will work.
Hope you all like it!
Thanks for reading!


